
Here’s a full detailed guide on How To Fix Analog Stick Drift. We’ve also included a full video step-by-step further down the page. Sometimes referred to as Joycon Drift. I’ve been really frustrated with faulty controllers recently and analog stick drift in particular has really irritated me. So, I decided to research how to fix it. I documented the process and created a video of everything you need to know in order To Fix Analog Stick Drift. We’ll explain what it is, how to fix it and how to avoid it from happening again in the future.
We’ve also detailed some replacement controllers that are said to be analog stick drift resistant. So, if you unfortunatley can’t repair it you can buy a new one that won’t suffer the same fate.
Your controller has more than likely been through a bit of punishment since you bought it. And that’s something all gamers have in common! We hammer our controllers more and more as the frustration grows. We’ve all seen the videos of someone losing a game of FIFA in the last last minute, throwing their controller down in disgust.
Whether it’s that final Kingdom Hearts boss or a last minute goal that’s caused a fit of rage to over come you, resulting in a thrown controller. Or, it’s just hours and hours of general wear and tear playing your favorite shooter. If you’re noticing analog stick drift on your controller don’t worry, here’s what you need to do to fix it.
How To Fix Analog Stick Drift
First up we need to understand exactly what Analog Stick Drift is. There are a couple of different causes. The first one is damaged hardware which is often what causes stick drift in the Nintendo Switch controllers. This photo I found online will help you to understand what causes it and why a self repair may not work 100% of the time.

The photo above is a close-up of the contact pad, along with the X, Y and Z axis. It would appear that the black pads in the corners of the blue contact pad are made using a fairly soft material. Theorists suggest this material is probably several layers of printed graphene .
The graphene acts as a resistor. The circuit fluctuations caused by metal contacts on the analog joystick are detected by measuring the differing strength of the electrical current.
The theory is that if the slider is far away, the electricity has to travel through more of the pad material which in turns weakens the current. The CPU then measures this and calculates X, Y and Z positions.
Other Causes of Analog Stick Drift
The analog stick drift can also be caused by natural fluctuations in the controller design. It might be positioned slightly outside of the axis of origin when in use.
This analog stick displacement is not unusual and can cause frustrating unintended movement or actions, which will depend on the game. This will depend on the developers chosen default sensitivity settings.
How To Prevent Controller Drift
One of the easiest and by far the best way to prevent controller drift is to make sure use of storage boxes or storage pouches for your controllers.
If they’re stored somewhere that’ll stop them coming into contact with daily contaminants such as dirt, dust and grime it’ll probably prevent almost all drift that isn’t related to software.
Obviously, if there’s a hardware fault you’ll need to follow the full guide below but basically, store it in a cupboard, a draw or a storage case and it’ll help stop drift in it’s tracks.
Warzone Stick Drift Fix
Every controller has an area near the center of each analog stick that’s software controlled. This area is sometimes referred to as a deadzone and you can edit the settings in the majority of games to reduce the deadzone and reduce the chances of suffering from severe analog stick drift.
Some games have really small default deadzones. Games such as Fortnite, Apex Legends and in particular, Call of Duty: Warzone. Warzone is renowned for having a really small default deadzone. This may cause more controllers to display stick drift whilst in game due to those default settings.
It’s easy to resolve deadzone drift in Warzone:
Resolving the problem is as easy as adjusting the “deadzone”.
- Locate the settings menu of the game
- Find the deadzone settings in the menus.
- Increase the deadzone value slightly.
- Make sure you save the adjustment.
- Rinse and repeat if you still suffer from drift.
Now, if this doesn’t work, the chances are, it’s hardware related. Fear not as there are other things you can do. It’s a little bit more complicated to fix hardware related analog stick drift but we’ll talk about that next. And, most commonly analog stick drift, is caused by dirt, grime and debris!

How To Fix Analog Stick Drift [Guide]
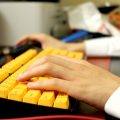
First things first you’ll need to get a hold of a can of compressed air or you can get an electric air duster. You can find it on Amazon, we’ve done the hard work for you, just hit the affiliate link and it’ll take you to the right product, click here.
Even if your controller is working as it should, it’s quite a good idea to give it a clean with a can of compressed air about once a month or so. This will help to prevent any build-up of dirt, grime or debris and hopefully make the controller last longer. You should also make sure you give it a good clean with a damp cloth (make sure to disconnect the power source)ever now and then. This is especially relevant if sharing controllers with your friends, it’s a good hygiene practice to get into!
Once you’ve got a can or air or an electric alternative make sure your controller is powered off. This is really important for your safety and to ensure you prevent any accidental damage to your controller. It’s also to prevent you from changing anything in your console system settings whilst you’re messing about with the controller..
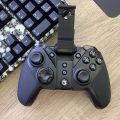
With the controller powered off, all you need to do is use your can of compressed air or electric air duster, and begin blowing around the bottom of the analog sticks, where they slot into the controller.
Spray in three second bursts and repeat a few times if necessary, waiting a few minutes between each try. You’ll need to wait a few minutes as those cans of compressed air can get extremely cold!
We found the can of compressed air works best. That’s due to having an included nozzle which is extremely thin, so you can get right to the bottom of the analog stick. This allows you to spray a concentrated blast of compressed air right on target, which is a bit more effective than a wider spray pattern.
The idea is to remove any bits of debris and dirt that might be disrupting the internal workings of the controller. With one hand spraying compressed air, the other hand should be moving the analog stick around in all directions. The goal here is to remove the grime to regain smooth movement.
Be careful not to invert the can of compressed air (unless the can is specifically designed to do that) as when inverted, compressed air can turn to liquid. Liquid and electrics are most definitely a bad combination.
Once you’ve done this you can try and dislodge any remaining debris and dirt underneath the analog stick. To do this is really simple, just start clicking in the analog sticks and move them around at the same time. Two or three minutes should suffice for this.
Give them another blast with the compressed air just to be on the safe side before turning the controller on.
Turn on your console and give the controller a try. With a tiny bit of luck, this will have hopefully fixed your analog stick drift issue on your controller and you can get back to gaming! Just don’t go throwing it around when your friend scores a lucky goal.
How To Fix Analog Stick Drift Guide Summary TLDR;
- Unplug your controller from any power sources and ensure it’s turned off. You can do this by pressing the PS button for 10-20 seconds.
- Move the left analog stick to the side and using your compressed air blow into the base of it.
- Do the same on the right analog stick.
- To ensure your stick buttons are moving smoothly click them a few times and move them in all directions to loosen the dirty and grime. try and get your sticks moving smoothly. The idea here is to dislodge any debris that the compressed air didn’t move.
Again, please remember the can of compressed air you use to fix your joycon drift can become very cold and icy so only use quick bursts!
What If This Doesn’t Work?
If the problem persists you could try something a little more drastic by dismantling the controller. But, you’ll need to be super careful. Ensure the controller is turned off and then open the controller by obtaining the correct size screw driver.
Follow the same process as above and again as I mentioned. Be careful you don’t invert the air can to cause it to turn into liquid!
By opening the controller you can remove any bits of debris a little easier. You’ll be able to see if you’ve cleaned anything or not. Dismantling a controller can be a bit tricky though but it might worth doing it if it saves you the cost of a replacement controller.
Rubbing Alcohol
The next step is even more drastic still, you can get hold of some Isopropyl Alcohol and use it to clean the analog stick and contact pads.
Isopropyl Alcohol or Rubbing Alcohol is extremely well known for its fantastic cleaning abilities, it’s used widely in the car detailing industry. So, if you have any doubts about it’s effectiveness it will clean the dust, dirt and grime on your controller stick just fine.
Now take few drops ( just two drops would be fine ) of alcohol and rotate the joystick. Make sure it spreads perfectly and then blow the joystick. This will remove the dust and allow the stick to move easily. Dust pushes the stick which causes the unwanted movements.
How To Fix Analog Stick Drift [VIDEO GUIDE]
Here’s a super useful how to guide video we recorded to help you fix your Joycon drift. It’s quite a simple method of resolving most Analog Stick Drift problems. All you’ll need is a screw driver and a can of air!
List of Tools Needed To Repair Joycon:
- 1 x Precision screwdriver set
- 1 x Can compressed air
- 1 x Pry Bar
If the above video is not something you’re interested in trying for yourself and your controller is less than a year old you can contract Sony! It should still be within warranty and as long as they can’t prove it’s broken due to accident damage or rage quitting they’ll replace it for free.
And that’s all you need to know to fix the analog stick drift issue.
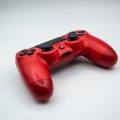
How To Fix Stick Drift PS4
All you need to do is follow the same process above! It’s a universal approach and it’s one that seems to work regardless of which console you are using.
This transferable fix between different makers controllers can prove valuable if you have more than one gaming system and have more than one controller suffering from Analog Stick Drift at the same time.
Nintendo Switch Joycon Drift [FREE Replacements]
Nintendo will fix your Joycon for free. If you previously paid a fee for it, they will also issue you a refund. Here’s how to do it:
- Head on over to support.nintendo.com/joyconrepair
- Submit a support ticket.
Request a refund for a previous repair:
- Call the support team on 1-855-548-4693 to request your refund.
- Get in touch via Nintendo’s customer service portal.
You can send in as many Joy-cons as you have in one package. The only downside is that they may offer you a replacement in a different colour. So, you may not want to do that if you have a special edition.
Joycon Drift F.A.Q’s
If your game playable character or the viewpoint camera keeps moving when you’re not touching your controller, the issue is likely to be analog stick drift, sometimes referred to as Joycon Drift.
Yes, you can get rid of it with two super simple methods. The first makes use of a can of compressed air. And the second uses rubbing alcohol.
The easiest and by far the best way to prevent stick drift is to make sure your game controllers are stored somewhere that will stop them becoming exposed to dirt, dust and grime that might be floating about in the air. Basically, store it in a cupboard, a draw or a storage case.
Nintendo will offer to fix Joy-Con drift for free.
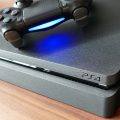
Can You Fix Stick Drift PS5
We’ve also see people ask this question. And, as above you can Fix Stick Drift on your PS5. Follow the exact same guidance and video above. If that doesn’t work check out the replacement controllers below or contact your console manufacturer to check if you are still in the warranty period.
Replacement Controllers
If your controller is not within warranty it might time to replace your it. No one likes spending money on something broken that isn’t your fault but you do have a couple of different choices when it comes to replacements.
The two choices are simple and we’ve outlined them below into premium or budget controllers.
Premium Controllers

Aim Controllers Custom Wireless Contoller:
AimControllers is one of the largest brands supplying fully modified and original Sony and Microsoft controllers, we are able to significantly increase your gaming experience and create a controller just for you. Because how you play matters!
Check it out on Amazon, hit the affiliate link here.

NACON Controller Esports Revolution Unlimited Pro V3:
Performance at your fingertips. NACON’s expertise in eSports controllers has set the standard for what every gamer needs from a controller. Choose your weapon and get ready to smash records on console and PC.
Check it out on Amazon, hit the affiliate link here.
Budget Controllers

PICTEK Controller:
A fairly modest feature set but it’s really budget friendly. It’ll do as a decent replacement but we’d recommend buying a more premium controller if you want to avoid drift!
Check it out on Amazon, hit the affiliate link here.
More Content
For more awesome content like this, hit the link to view our jam packed categories. You’ll find amazing in depth reviews, how to guides and the latest tech and gaming news.
Disclosure:
The Amazon links in this article are affiliate links. This means that if you go onto buy something from Amazon after clicking on them we may get a small commission. It won’t cost you anything extra but it helps us pay towards the running costs of the blog. It allows us to bring you great content! Thank you so much for your support.
CodeWithMike is a participant in the Amazon Services LLC Associates Program, an affiliate advertising program designed to provide a means for sites to earn advertising fees by advertising and linking to www.amazon.co.uk.
CodeWithMike is a participant in the Amazon Services LLC Associates Program, an affiliate advertising program designed to provide a means for sites to earn advertising fees by advertising and linking to www.amazon.com


Thanks Mike for this detailed information guide on “How to fix Analog Stick Drift”. I will try the method you have mentioned in the article and will get back to you once its start working
Hi Owen,
No problem! I hope you manage to get it sorted.
Mike.
Thanks for sharing the complete instruction for Fix Analog Stick Drift step by step. I did not understand clearly To Fix Analog Stick Drift by reading this article, but after watching How To Fix Analog Stick Drift VIDEO GUIDE its clear to me,
No help WHATSOEVER. There has to be a settings, driver or calibration issue. ALL controllers that I plug into a PC (Even BRAND NEW) drift up. ALWAYS. I can’t figure it out and it’s really frustrating.
I mean, you could try and adjust the settings, they’ll probably be a deadzone option in one of the in-game menus. Give it a shot.